Developing Color Film Part 2: The Development Process.
Now that we have our chemicals mixed we are ready to get started with developing some film.


The CineStill instructions state that one kit should be good for developing up to 8 rolls of 120 film, 8 rolls of 35mm (36 exposures), and 12 rolls of 35mm (24 exposures). I have not processed more than 6 or 7 rolls of 120 film per batch of CineStill, but I plan on testing the capacity limits in the near future.
How difficult is this really?
NOT DIFFICULT AT ALL!
With black and white film, I have come to expect standard, unsurprising results from my processing. With color film, it helps to go into the experience with no firm expectations. There are many variables that can affect the color tonality outcome. These variables include: type of film, in camera exposure, temperature, push/pull development time, and even variations in agitation. Yet even with all these variables in the mix, I, a relative newbie to color film developing, have yet to experience any complete failures. So, go into the darkroom with an open mind, and you will surely come out pleasantly surprised with your colorful results!
Getting the Temperature Just Right:
For me, this was the most intimidating part of color developing, as with black and white I often find myself casually testing the temperature of my developer and often just using my hands to judgel for that 68°-70° F (20°C) room temp feel. Color film is not as forgiving as black and white and requires a slightly more scientific approach. With that said, it is not nearly as difficult as it sounds, and 102°F (39° C) is not as hot as I initially assumed.
Before going into the dark to load the film, I like to have the chemical temperatures slightly higher than required. (~106-108°F). While I'm in the dark, I keep the bottles in the sink filled with water of the same temp.
How to Change the Temperature of the Chemicals:
If you dig way back, you may remember something about heat transference from grade school science. Or you may be well versed in thermodynamics and I beg your forgiveness for the over simplification of the following explanation. Basically, if you have two things of unequal heat touching (especially liquids) they will strive to reach a equilibrium. This works in our favor and makes it quite easy to warm or cool our chemicals.

First I measure the temps of my developer and blix to determine whether they are too hot or too cold. Then I fill the sink with water in one direction or another. For example, if the developer is only 70°F I will run steaming hot water in the sink and soak the bottle, periodically measuring the temp of the developer as it rises. Conversely if the developer is 120°F I will soak it in very cold water, and watch until the temp comes down to ~106°F. With a bathroom sink full of either very hot or very cold water, the 1 liter bottle of developer changes temperature much more quickly than you would expect. Once the developer temp is in the desired range. 106°-108°F, I drain the sink and refill, more carefully this time, to provide the bottle with a bath of 106°-110°F water. The water will invariably cool down while you are loading film, which is why I start with it slightly higher than desired. After some practice, you will get a feel for what initial temperatures work for you depending on your sink, your room's environment, and how long it takes you to typically load film. You can always make more adjustments after the film is in the tank, I just like to have it mostly ready to go once I come back out of the dark. Also, along with the developer and blix, I soak an additional container of plain water to use for my pre-soak. Finally, it really helps if you have a two sink set-up, but since I use my bathroom I make do with one sink and a little finesse and quick maneuvering.
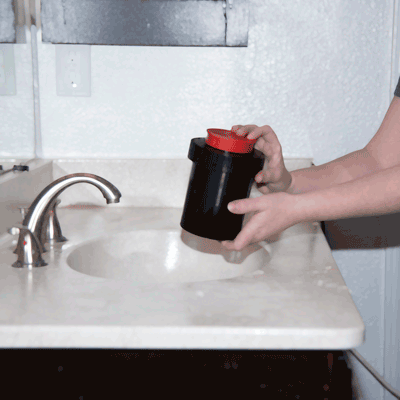
Go Load the Film:
If you are new to developing, my article on developing black and white film gives detailed instructions on how to load film onto the reel and into the developing tank. Developing Black and White Film.
Before getting started, I take some final temperature readings and make any last minute adjustments as necessary.
Optional Pre-Soak:
1 minute
102°F (39°C)
I have found that it helps to partake in the optional pre-soak. Simply take the extra container of water that you've heated to around 102°F (temp needs to be close but ok if not exact), and pour it into your tank. Let this sit for one minute. While I'm letting it soak, I quickly make any necessary adjustments to my sink water bath temperature. (usually it needs a spurt of hot water.) After one minute pour out the nice colorful mixture and move on to the developer.
Developer:
3.5 minutes
102°F (39°C)
This is the most critical step, and it goes by quickly. The goal is to develop at EXACTLY 102°F (39°C). I personally like to start at 104°F-106°F because I find that as I take the tank in and out of the bath to agitate it tends to cool off a tiny bit. After pouring the developer, agitate for the first 10 seconds and then 4 inversions every 30 seconds.
Agitation Methods: Inversion vs Twiddling:
I personally prefer the inversion method. I feel like my film develops more evenly. Others will argue that twiddling (twirling the stick in the Paterson type tank) is better because it prevents bubbles from forming. Two advantages of twiddling are that you can keep the tank mostly submerged in the water bath, while agitating, and it is much less messy, as even the most minor leaks make a big mess with color chemicals. I experiment with both methods and still prefer taking the tank out of its bath and inverting it.
When the 3 and a half minutes is up, use your funnel and pour the developer back into its container.
Blix:
8 minutes
75°F-105°F (24°C - 40°C)
Now pour the blix mixture into the tank. No need to stress if the temperature of the blix has cooled a bit, the instructions just require it be with in a range from 75°F - 105°F (24°C- 40°C). I usually have no issues keeping it around the 100° mark. As with the developer, agitate for the first 10 seconds, and then 4 times or 5 seconds every 30 seconds. During the 8 minutes I usually refresh the heat of the water bath as with out any reheating it has probably cooled significantly at this point (your sink's depth/water surface area ratio will affect how quickly it cools. And unfortunately mine is very shallow and wide.) When the 8 mins is up pour the blix back into its container.
Wash:
8 - 10 minutes
75°F-105°F (24°C - 40°C)
Now you can remove the lid of the tank and start the wash. The instructions say 3 minutes, but I typically wash for 8. I find that after 3 minutes the water still comes out slightly stained, this may be due to the hardness/softness of my tap water. With the tank under warm running water, I fill and pour several times before letting the tank sit under the running water. I use my hand to swish the reel around the tank and the water runs. As I'm nearing the end of 8 minutes I pour the tank out several times to make sure the water coming out is completely clear, before finishing the wash. During the last minute of wash, I grab a jug of distilled water and give it several more rinses. After that I take the reel out and give it several good shakes before hanging the film to dry.
Optional Stablizer:
1 minute
Room Temp
Stabilizer is designed to help your negatives last longer and dry cleaner. As of right now, I skip this step. This is mostly due to laziness and not wanting yet another chemical to deal with. I will, however, start experimenting with this sometime in the near future. I have not been color developing long enough at this point (4 months or so) to see any degradation of my negatives, but I always scan with in a few days of developing. It will make an interesting long term experiment to stabilize half a roll and see the difference in a years time.
Results:
Here are some of the successes from various color films that I've self-developed.
Every film type has its own unique look, and the imprecise nature of at home color developing can yield surprisingly pleasant results. Also my digital inversion and color correction method has evolved over time resulting in more accurate positive images.
Overall, I love Kodak for its bright deep blues, Fuji for its more subdued color palette, and CineStill for its more vintage aesthetic.
Kodak Ektar 100


Kodak Porta 400


Fuji Pro400h


Cinestill 50D


A Few Mishaps:

So far, I've only really had one mishap, which is this strange red stain on a few frames which appeared on a couple rolls that I developed at the same time. I think I may have neglected to agitate properly during the blix phase of the process. Since then, I usually stick to one roll at a time in order to use the more manageable smaller tank, and haven't had a recurrence of the issue.
This photo had a light leak, which isn't a developing issue, but I thought it looked cool anyways.
