Self Developing Color Film
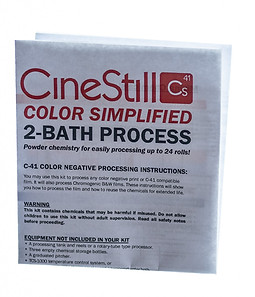
I always though color film developing was something better left to the professional labs. I was intimidated by the extremely temperature sensitive nature of color film, and the more 'complicated' developing process. While these things may be true, I have discovered that there is NO reason someone shouldn't give developing color film at home a try! There are various products available for color film developing, but the best introduction to the process is the easy to use CineStill 2 bath processing kit.

Questions about C-41 and the CineStill kit:
Can this kit be used for any color film?
When I first decided to give color developing a try, I had some very basic questions. I knew that Cinestill made several types of film as well as the developing kit, but could the kit be used for developing other films such as Kodak Ektar, Porta, and Ektachrome or Fuji Velva, Superia, Provia, and Pro400h?
Simple answer = This kit can be used for any C-41 film.
Any film that labeled as 'Color Negative Film' is film that uses the C-41 processing. Films that are labeled 'Color Transparency Film' use the E-6 process and are often referred to as Slide Film.
What does C41 mean?
C-41 refers to the processing of color negative film. The film is made of of multiple emulsion layers containing silver and dye, the developer reacts with the silver in each layer while an oxidizer reacts with the color dyes creating the appropriate negative color in each layer.

Color Negative Film (C-41) Basic Facts:
-
The type of film that most amateur photographers/ regular people used on a daily basis prior to the advent of digital photography.
-
Produces the negative image that is then printed into the positive (or inverted during scanning).
-
More difficult to scan.
-
Seen as forgiving, several stops of under/overexposure can be recoverable.
-
Colors may fade and change over long periods of time, not good for archiving.
-
Slightly more affordable.
-
Examples include; Kodak Ektar and Porta, as well as Fuji Superia X-tra or Pro400H.
Color Transparency Film/Slide Film (E-6) Basic Facts:
-
Produces a positive transparent image, used for viewing with projectors.
-
Seen as unforgiving, exposure must be EXACT.
-
Color integrity lasts a long time
-
More expensive
-
Easy to scan.
-
Commonly used by professionals or amateurs who enjoyed viewing with projectors.
-
Examples include; Kodak Ektachrome and Fuji Velvia and Provia.
What happens if I process color transparency film with a C-41 kit?
This is called cross processing, and a topic for a future blog article!
Can I develop two different types of film at the same time?
Yes! One of the best parts of the C-41 process is that all brands and ISO's can be developed simultaneously. I have used my large Paterson tank to develop 2 120 rolls at a time, one Kodak Ektar 100 ISO with a Kodak Porta 400 ISO, or a roll of Fuji Pro 400h with a roll of Cinestill 50D.
Does the CineStill kit allow for push/pull processing?
Yes, the instructions that come with the kit specify times for pushing as much as 3 stops and pulling 1 stop. I have yet to give this a try, as I have heard that normal process times will be adequate for film that has been over/underexposed by around 2 stops. I found this to be true when I accidentally shot a roll of 400 ISO film at 100 ISO settings, which I then developed at normal times and got perfectly fine results.
Where can you purchase the CineStill developing kit?
I purchase my CineStill 2 step kits from Don's Used Photo Equipment in Dallas, TX. If you have access to a film supply shop, I highly recommend purchasing locally. These kits can also be purchased off the CineStill website or in person at B&H in NYC. All sources that I've found sell the kit for $25.
Once mixed, how long will a batch last?
The instructions say that when stored in a tightly sealed container, the chemicals should last from 8 - 12 weeks. I have not yet used a batch past about 6 weeks. This will make for a good future experiment, developing half a roll in 12 week old chemicals and half a roll in a fresh batch to see the difference.
Getting Started: Mixing the Chemicals.
As someone who primarily uses liquid developing chemicals, I was initially intimadated by having to mix powders to produce the developer and bath/fixer. Although slightly time consuming, it turns out to be a simple process using CineStill's easy to follow directions.
Opening the Kit:
Along with the instructions, you will find three packets: 1 for the developer, and 2 for the Blix (bleach, and fix)
Instructions
Developer
Blix
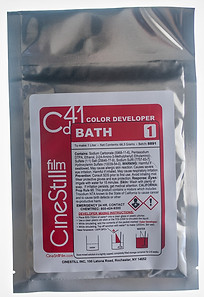

Mixing the Developer:
I recommend wearing gloves and even eye protection when mixing these chemicals.
Step 1
Pour 600ml of hot water into a designated mixing container. (I use ~120°F distilled water from my hot water kettle, this is not necessary, as hot water from the tap will do just fine. Temperature is not critical at this point, but hot water will help the powder dissolve faster and is a good starting point if you plan on using the developer right away. Also I use a designated Tupperware for my mixing to avoid contaminating my graduated cylinder.)
Step 2
Slowly pour the color developer bath powder (labeled 1) into the container of water while stirring continuously. Keep stirring until all the powder has dissolved.
Step 3
Transfer the dissolved developer into a storage container at least 1 liter in size. Using the brown light proof plastic or glass jugs is recommended. (I just use 1 liter water bottles that I get for free from work, and make sure to store them in a dark cupboard.)
Step 4
Measure out another 400ml of warm water and pour into the container to make 1 liter.
Step 5
Use a sharpie to label and date the bottle. Then if you are planning on developing right away, fill the sink with hot water, to soak the closed bottle, keeping it warm while you mix the Blix.
Mixing the Blix:
Thoroughly wash/rinse your mixing container, funnel, and any other instruments prior to mixing the Blix.
Step 1
Just like with the developer, pour 600ml of hot water into a designated mixing container.
Step 2
Slowly pour the contents of packet A (step 2) into the container while stirring continuously. Stir until all the powder is dissolved. This should result in a very clear liquid.
Step 3
Transfer the dissolved liquid into a storage container at least 1 liter in size.
Step 4
Now comes the fun part! Pour the contents of packet B (step 3) into the container with the already dissolved packet A. This will turn the liquid bright dark purple and start an endothermic reaction. The liquid will bubble a bit, but it shouldn't be too dramatic or explosive.
Step 5
While the reaction is taking place, start pouring the liquid back and forth between your mixing container and storage container. The instructions say the the reaction should last about 5 minutes, but doesn't exactly specify how long you should pour back and forth. The majority of the reaction seems to be over by the time you've made the first pour, so I pour back and forth about 5 times, or until the sludge at the end of each pour turns more liquid.
Step 6
Once the pouring is complete, and the liquid back in its storage container, cap and label and you are ready to start developing... or rather ready to start bringing the chemicals to the correct temperature for developing. This should be easy if you have been using warm water and the developer has been sitting in a warm water bath while mixing the fixer.